Fixing a Leaking PVC Line: Glue, Fittings, Valves and Repair Couplings
A clean cut, the right fittings and patience with the glue are most of the repair.
October 7, 2026 · 4 min read
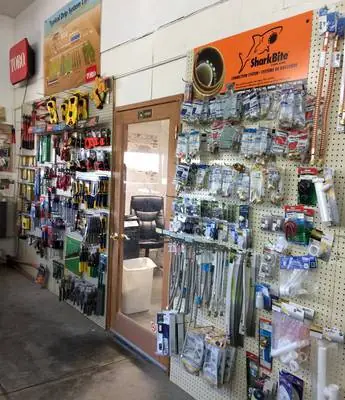
A wet spot in the orchard, a geyser in the alley or a pressure drop that makes no sense usually means one thing: a leak in a PVC line. The repair itself isn't hard. Most of the trouble comes from rushing the glue, using the wrong fitting, or pressurizing the line too soon. This walk-through covers the basics for a typical buried or surface PVC line.
Find the real leak first
Water shows up where it comes out of the ground, which isn't always where the pipe is broken. It follows the trench and the soft ground. Shut the water off, then dig back along the wet area until you find the actual crack, pinhole or split joint. Look at the fitting nearest the wet spot first, since joints fail more often than straight pipe.
Dig a bigger hole than seems necessary. You'll need room to work with both hands, and room to see. Clear the mud off the pipe so you can look at the whole area. Cracks from freezing often run lengthwise, and one crack may have a neighbor a foot away.
Pick the right repair for the damage
A small hole in the middle of a straight section means cutting out a short piece and replacing it. A cracked fitting means cutting out the fitting and the pipe stubs on either side. In both cases the goal is to end up with clean, square cut ends and enough room to put in the replacement.
This is where a repair coupling earns its place. A normal slip coupling stops at a shoulder inside the middle, so you can't slide it over a pipe that's already in place and fixed at both ends. Telescoping repair couplings and slip-style repair fittings are made to slide, so you can fit a new section into a gap without bending the pipe or digging out a long run. The store carries Flo-Control repair products, Dura PVC fittings and Pierce fittings.
Cut clean and prepare the pipe
Use a pipe cutter or a fine-tooth saw and cut square. A crooked cut leaves a gap in the socket and a weak joint. Trim the burrs off the inside and outside edge with a knife or a deburring tool. Wipe the pipe clean and let it dry. Glue doesn't bond to wet surfaces, and a muddy trench makes that harder than it sounds, so keep a clean rag and a dry spot to work.
Match your fittings to your pipe. PVC comes in different wall thicknesses and sizes, and not everything that looks alike fits together. Check the printing on the pipe for the size and rating, and write it down before you shop.
Primer and cement, step by step
Dry-fit everything first. Put the pieces together without glue and mark where each pipe enters each socket. Then take them apart and work through this order:
- Apply primer to the outside of the pipe end and the inside of the socket. Primer softens the plastic so the cement can bond.
- While the primer is still wet, spread cement on the pipe end and a lighter coat inside the socket.
- Push the pipe in all the way and give it a quarter turn as you go.
- Hold it firmly for several seconds, because the pipe tries to push itself back out.
- Wipe off the extra cement at the joint with a rag.
The store lists IPS glue and primer, so you can pick up both together. Check the label on the can for what it's rated for and how long to wait before pressure goes back on. Cold weather slows the cure, so give it more time than you think you need. Turning the water on too early is the number one reason a fresh repair leaks.
Brass or PVC valves
If the leak is at a valve, you've got a choice. PVC valves resist corrosion and work well in buried boxes and on lines where nothing will knock them around. Brass valves are tougher against impact and heat and tend to hold up in exposed spots near a pump house, a hydrant or a place where equipment brushes past.
When you thread a fitting into a valve, use thread tape or paste suited to the job, and don't crank it down. PVC threads crack when overtightened, and the crack might not show until the line is under pressure. Snug it, then a little more, and stop. Putting a plastic male thread into a metal female is easier on the parts than the other way around.
Bring the old piece to the counter
Half the battle with an unfamiliar fitting is knowing what to ask for. Carry the old piece in, and the person at the counter can match size and type in a minute. Take a photo of the wet spot and the pipe too, so you remember the layout when you're back at the hole.
Once the cement has cured, open the valve slowly and watch the repair while the line fills. Check the joint, check the nearby fittings, and don't backfill until you're sure it holds. If something weeps, shut it down and redo the joint. Doing it twice beats digging it up a third time.
Foothills Irrigation, (509) 678-4951
Call (509) 678-4951More articles
Spring Start-Up Checklist for Your Orchard Irrigation System
Do the start-up in the same order every year and small problems stay small.
Drip, Micro-Sprinklers or Impact Sprinklers for an Orchard Block
There's no single best emitter, but there are good questions to ask before you buy a mile of tubing.