Spring Start-Up Checklist for Your Orchard Irrigation System
Do the start-up in the same order every year and small problems stay small.
October 7, 2026 · 4 min read
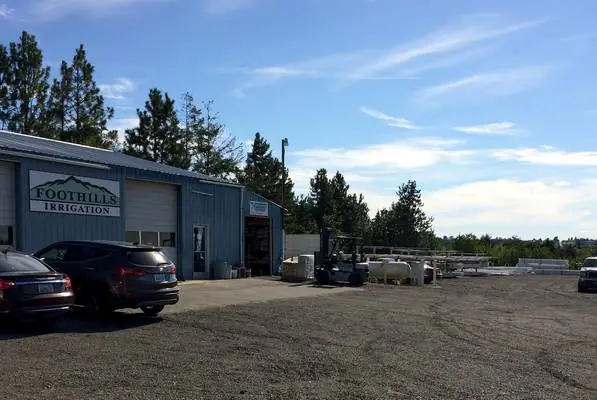
The first warm week in the upper valley always seems to show up before the irrigation system is ready. Buds are moving, the ground is drying out, and somebody realizes nobody has opened the filter station since last fall. A start-up routine done in the same order every year keeps small problems small. This is the order that makes sense for most orchard blocks with a pump, a filter station, mainlines, submains and sprinklers or drip lines out in the trees.
Start at the pump and filter station
Everything downstream depends on clean water, so begin where the water comes in. Check the pump and its controls before you worry about anything else. Look for whatever sat through the winter: loose wiring, mouse nests in a panel, a seal that weeps. If you drained the system last fall, make sure every drain is closed again before the pump runs.
Sand media filters deserve a close look. Media wears down, packs together, and sometimes channels, which lets fine grit slip through to the lines. If you can open the tank, look at the bed. It should be even and clean, not crusted over or dug out where water found a shortcut. Flow-Guard sand media is one of the products the store carries for refilling tanks, and it helps to bring the tank size or model when you ask about it.
Here's what to go through at the filter station before the first restart:
- Move the backflush valves and the controller that triggers them, and make sure they work freely.
- Check the media level and the condition of the bed.
- Look at lids and gaskets for cracks or flat spots.
- Read the pressure gauges on both sides of the filter. A gauge stuck at zero tells you nothing, so replace it.
- Clean or replace any screen filters downstream of the sand tanks.
Check the air vents and pressure reliefs
Air vents and pressure reliefs sit quietly all season until one fails, and then the damage is real. A vent that's stuck shut lets air collect at the high points in the pipe. When the line fills fast, that air can slam through as a pressure spike. A relief valve that's seized won't open when it should. Neither one warns you before it quits.
Take each one apart far enough to see inside. Look for grit, mineral buildup and worn seals. Move the float or the spring by hand. If it sticks or feels gritty, clean it or replace it. Swapping a vent is a small job compared to repairing a split mainline. The store stocks air vents and pressure reliefs, so if one is past saving, bring it to the counter and match it up.
Fill the system slowly
Open the main valve a little at a time. A fast fill pushes air through the pipe at speed, and that can crack fittings and pop glued joints that went through a winter of freezing and thawing. Fill the mainline first and let the air escape through the vents. Then open the submains one at a time.
Listen while it fills. Hissing at a joint, a rattle in a valve, or a pipe that bangs all mean you should stop and look before going further.
Flush the lines until the water runs clear
Winter leaves debris in the pipe. Sediment settles, insects build nests in open ends, and old glue and scale break loose. Open the flush valves or end caps at the end of each submain and let water run until it comes out clear. Close them, then move to the next one. Skipping this step is how emitters and nozzles plug in June.
Drip lines need the same treatment. Pull the end cap on a few laterals in each block, let them run, and cap them again. Look at the water. If it comes out brown or gritty, keep it running.
Walk the block and look at every head
With the system running, walk each block. This is the part that gets cut short when the weather turns, and it's the part a pressure gauge can't do for you. You're looking for the things only your eyes will catch:
- Sprinklers that aren't turning, or that spin too fast.
- Nozzles that are plugged, worn or aimed at the ground.
- Wet spots that point to a buried leak.
- Dry stretches that point to a plugged line or a valve that didn't open.
- Heads knocked sideways by equipment last season.
- Tubing chewed by rodents or pulled loose from its fitting.
Nelson, Toro, Antelco and Irritec products are all on the shelves in Cowiche, and the store says many products are on hand or can usually be there within a day. That makes a mid-week fix realistic.
Write down what you found
Keep a simple notebook for each block. Note which heads you replaced and what the gauges read at the filter on day one. In July, when something looks off, you'll have a baseline to compare against. A pressure drop across the filter that's bigger than it was in spring tells you something. So does a block that needs longer to fill than it did in April.
None of this is complicated. It takes a day or two before the heat arrives, and it's a lot easier than chasing problems in the middle of a heat wave with fruit sizing up.
Foothills Irrigation, (509) 678-4951
Call (509) 678-4951More articles
Drip, Micro-Sprinklers or Impact Sprinklers for an Orchard Block
There's no single best emitter, but there are good questions to ask before you buy a mile of tubing.
Picking Season Prep: Bags, Tickets, Ladders and Trellis Checks
Most picking-day problems can be seen in the week before the crew arrives.